Pages

Friday, December 08, 2006

*Gift Card Tins*

Part of the gift we are giving the kids' teachers Gift Cards to Chapters this year for Christmas. I had some business card sized tins sitting around and was planning on using them for Gift Cards this Christmas... decorate them up and pop the Gift Card inside. But the tins are too small. Sigh. What to do what to do.

I also have a bunch of CD Tins hanging around my craft space so I decided I would use them... a little big, but they serve a purpose.

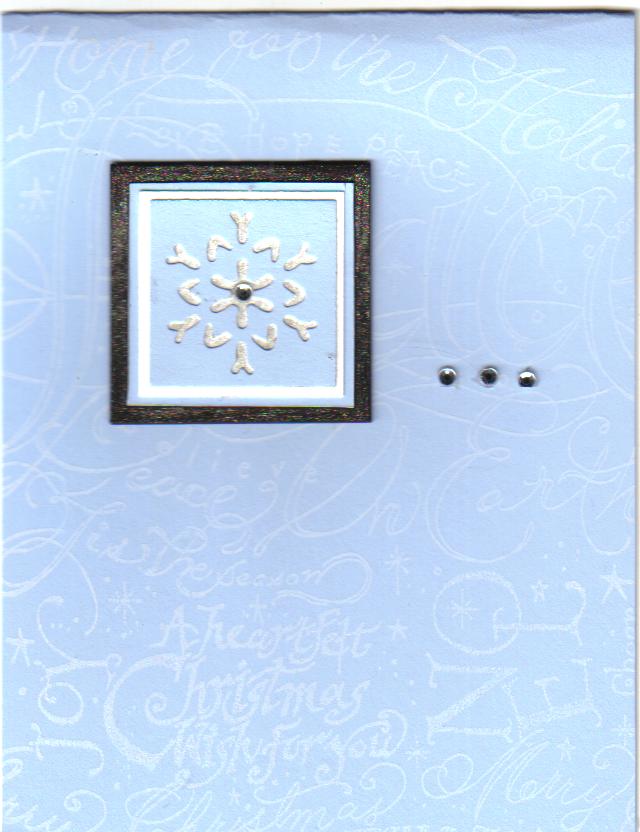
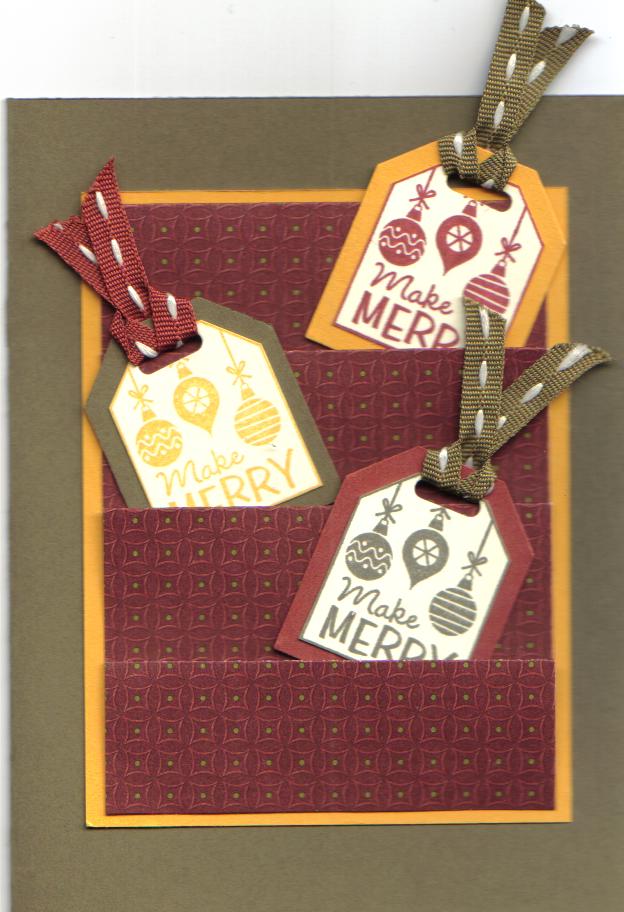
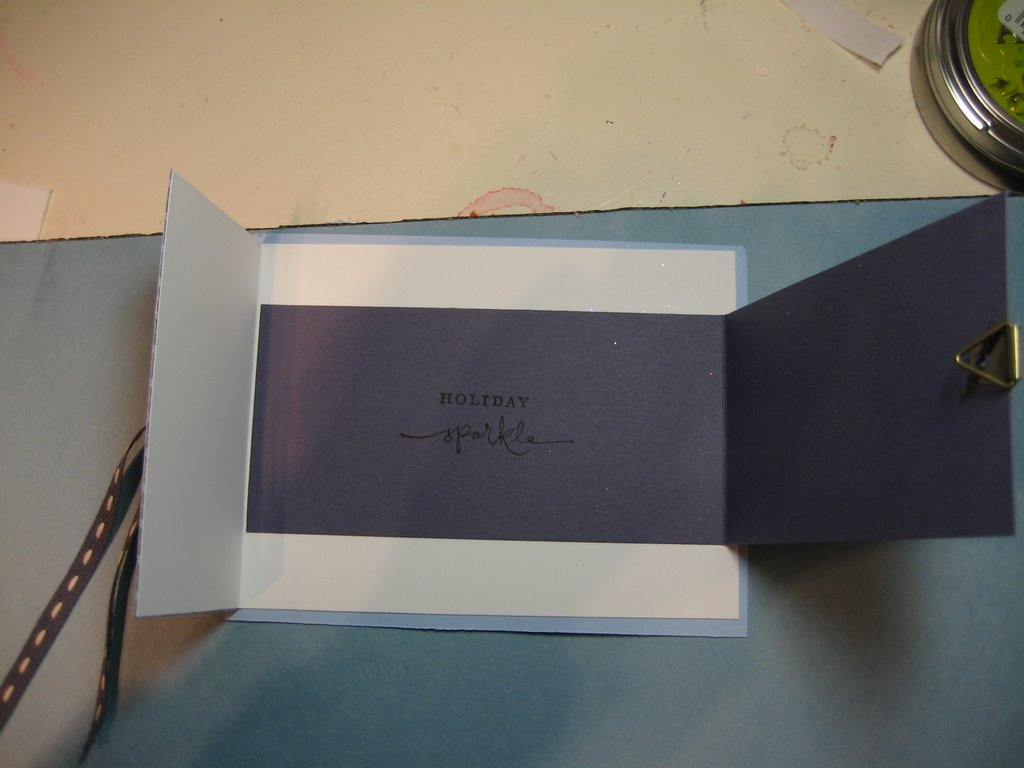
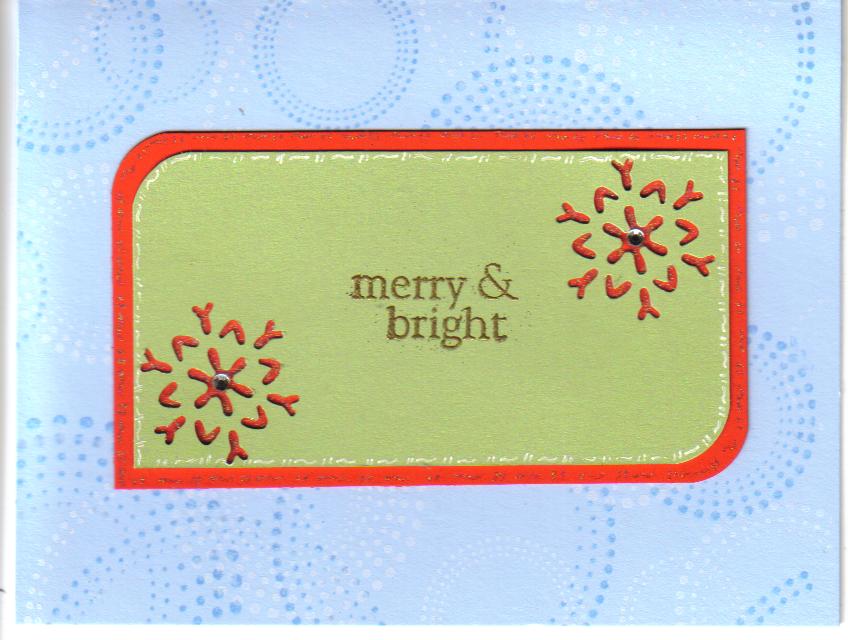
This was the first tin I created... I used Stampin' Up! Holiday Thyme paper to cover the tin. I cut the paper just slightly smaller than then dimensions of the tin and used the large corner rounder for the corners. I adhered the paper to the top and bottom of the tin with a lot of double sided tape. The bottom of the tin is covered with the striped paper you see behind the JOY. JOY is stamped with Bashful Blue on Whisper White and then layered on to Bashful Blue. I used the two sizes of Tag Punch for the JOY. I added some ribbon to the tags and some bling to the corners.

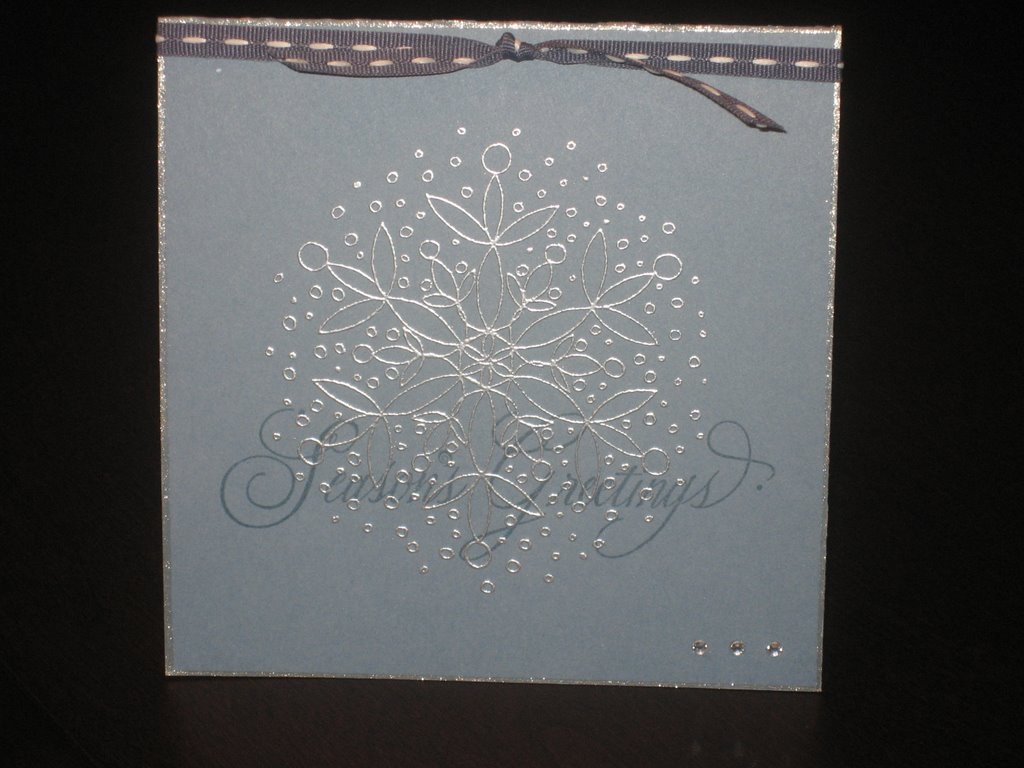
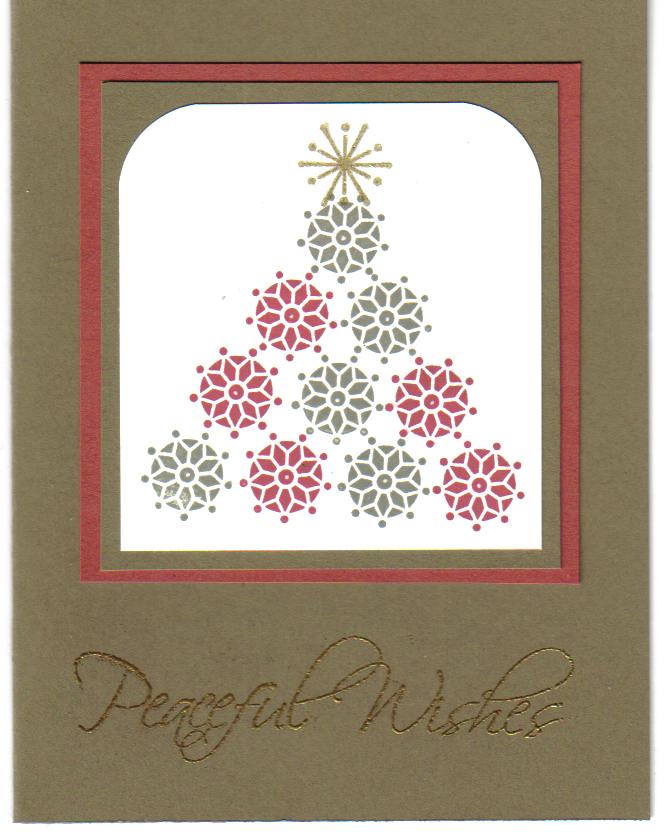
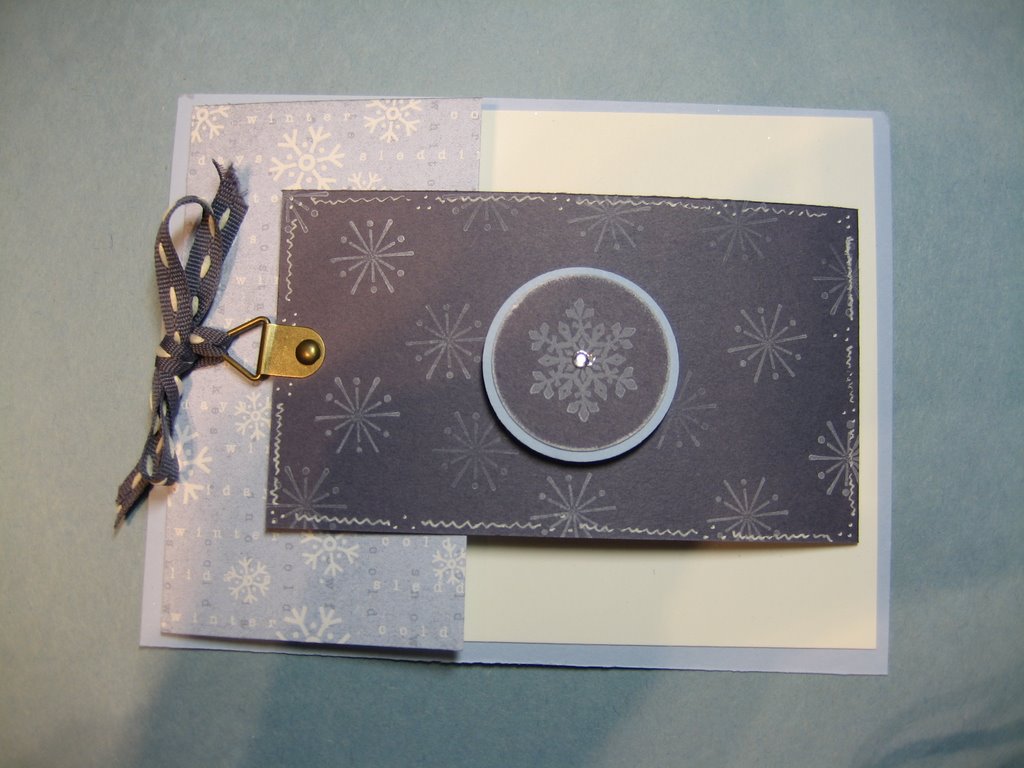
Again, I used the Holiday Thyme paper on this tin... the reverse of this design is on the back of the tin. I stamped three of the outline trees from Shapes and Shadows in black, cut them out, then covered them in VersaMark and Iridescent Ice embossing powder. The middle tree is adhered with a pop dot. I also added a cranberry crisp stitched ribbon and some bling to the corners and along the ribbon. This one is my favourite of the three.


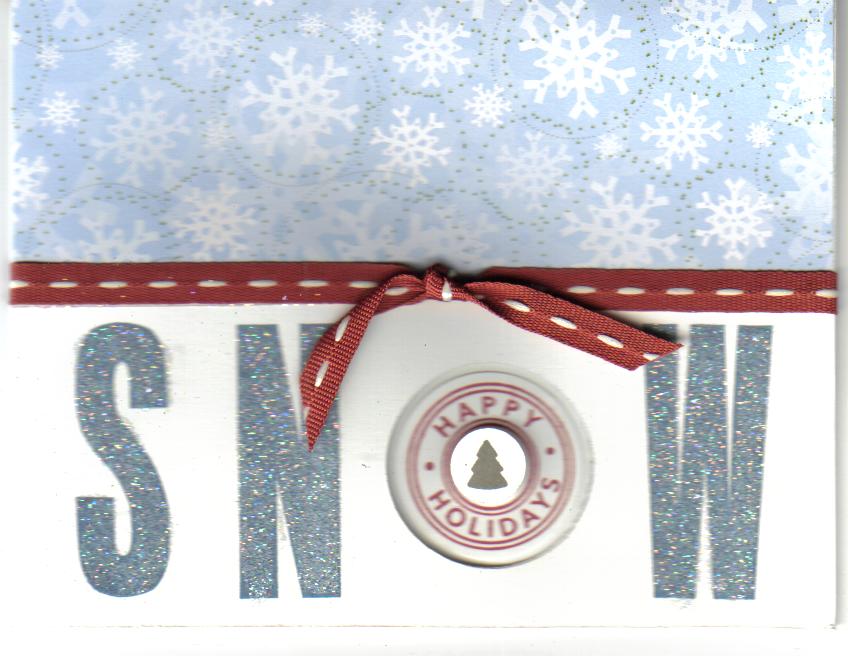
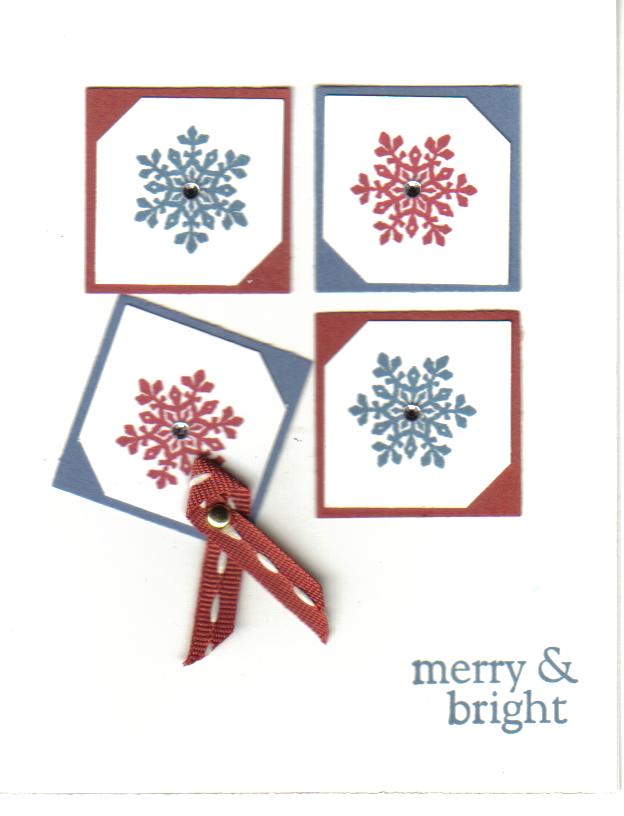
Again, Holiday Thyme paper used on this tin. Not much different to tell you about this tin.

The gift cards are taped to the inside of the tin to keep them from rolling around inside.

I am very pleased with how these turned out and might make some for birthdays too!

Thanks for looking!

Thursday, December 07, 2006

*CST Holiday Card Contest WINNER!*

For the first time since I started having this contesteight years ago on my online YahooGroup (CST), I have finally won a prize! I won fourth place in the Holiday Decorating category. If you want to see all of the entries, check them out here. There were a lot of amazing cards to choose from this year and I am honoured to have made it into the top 4 in my category. I had a whole different card created for the contest (see here), but changed my mind at the last minute.

This card was a little time consuming just to get it all coloured in. The image is one big stamp by Peddlars Pack. I stamped it in black ink on Whisper White cardstock. I coloured the stars in with a gold gel pen and then used Stampin' Up! markers in Certainly Celery, Regal Rose and Bashful Blue to decorate the ornaments. I also added some sparkle to the swirls and line stars with my Sakura Stardust Gel Pen. I attached the main image to Regal Rose cardstock. I stamped the greeting (Hero Arts) on paper weight vellum and wrapped it around the Regal Rose layer and adhered it to the back before attaching it all to a Certainly Celery card. I added two crystal blings on the vellum as well as four pink blings to the green ornament with the blue strip near the top right of the card.

I've had this stamp for about 3 years now... and this is the first card I've ever created with it. I just didn't know what to do with it. Sure am glad it was sitting there waiting for me to see the light!

Wednesday, December 06, 2006

*Ho Ho Ho*

I don't know what it is about Santa images, but I have a really tough time using them to create cards.

I wanted to do something yesterday with my Marvy Giga Scalloped Square Punch and decided to give Santa a shot. It started out OK, but then I had a heck of a time trying to figure out what to do next.

I stamped Santa (PSX) on Whisper White, centred him in the punch and punched him out. I punched a second white square and coloured the corners with my Sakura Stardust gel pen to create some shimmer. I coloured Santa with a gold gen pen and a Real Red marker. I used Liquid Applique (or puff paint) on the fur of his hat and Dazzling Dimonds glitter on his beard and mustache. I added some little red bling to the four corners of the Santa square.

The Real Red layer is cut 1/4" smaller than the Whisper White card and I used the tag corner punch to snip off the corners. I then used the random splatter background stamp from Itty Bitty Backgrounds (SU) with white craft ink. I added the striped ribbon... don't have a clue where I got it from... been sitting in my ribbon drawer for ages! Imagine my surprise when it had double sided tape on the back of it!! I stamped Ho Ho Ho (Outlines Rubber Stamps) in Basic Black

I am actually quite pleased with how this Santa turned out... doesn't happen often with a Santa image for me!

Tuesday, December 05, 2006

*Hey Frosty!*

I just love Snowmen.... ahhhhh. Not a fan of making them... too cold to be outside LOL!

I made card when my Mom was here and kept forgetting to bring it up from my crafting space to take a photo of it. I had to take a photo to at least try to show you that there is dimension to this card. The card base is Buckaroo Blue. On top of that is a piece of Bashful Blue and is adhered to the base card in the centre and on each of the two sides, creating a curved "book" look to the card. The decorated paper is adhered in the same way. The top layer is Whisper White. The snowman and greeting were stamped with blue Ultimate Metallic ink and embossed with blue pearl embossing powder. I coloured Frosty with my SU Markers. I then adhered the white layer in the centre and along each of the two sides. It all ends up looking like an open thick book with the pages curving.

Not sure that you could mail this card... it would get crushed and the effect would be ruined. It would be a "give in person" type of card.

Thanks for looking!

*My UHU Glue Experience*

Back in November I posted about being able to get some free samples from UHU. The day my samples arrived, they had been sitting in my mailbox for several hours and it was WAY cold outside, so I decided to wait until they warmed up to room temperature before I tried them.

I will admit, first and foremost, that I don't use a lot of glue. I much prefer double sided tape in my cardmaking.

I received, in the mail, a UHU Twise & Glue (the stand up bottle) and a Scrapbookers Pen. The Twist & Glue is neat as you can use it with just a small hole of an opening (not tiny, but a smaller hole) or you can twist the top and use the tip that comes up to spread out the glue. Works really well both ways. The small tip, when squeezed just a bit, was enough to glue on some pieces of bling. And it was great to be able to spread out the adhesive for working with paper.

The Scrapbookers Pen is a nice size and shape for using, however I found the barrel to be a little soft so it was easy to squeeze and get too much glue on my project.

Both glues held well and as long as I didn't use too much, my paper didn't buckle at all.

Thanks so much for the free samples! I will be using these for sure!

Monday, December 04, 2006

*Happy Winter*

My apologies for not posting something sooner than this. I am sure you can all appreciate how busy this time of the year can be. I am still totally in the Holiday Card Making mode, however I am now done all of my cards for the year. I decided that instead of a whole whack of one design, I would do several different designs... a dozen of each card.

This is the last card I decided to do. I created the prototype this morning, mass produced the dozen this afternoon. I have printed off my address labels and hope to get my cards ready for the mail tonight.

The card base is Cranberry Crisp (I will really miss these new In Color colours when the new Stampin' Up! catalogue comes out! I used a piece of the Holiday Time decorated paper cut 1/4" smaller than the card. I used the two larger circle punches to cut one circle in Whisper White and one in True Thyme. The snowflake is a silver brad I bought a few years ago. "Winter" is stamped in black ink on True Thyme and layered on to the back side of the patterned paper. I added sparkle to the small piece of patterned paper with my Sakrua Stardust Gel Pen. The ribbon is, of course, the stitched Cranberry Crisp Grosgrain from SU! (Imagine how excited I was to find out they will continue these ribbons until the end of the current Idea Book and Catalogue!

Hopefully there will be some more crafting happening in the next few days. I have a lot of running around to accomplish, but I hope to fit some creative time in there as well. In the lat 2 years or so I've been crafting less and less... with the blog, I find myself wanting to craft more often to be able to share new things with all of you.

So, for encouraging me (directly and indirectly) to create, thank you!!

Friday, December 01, 2006

*Stampers Club*

I started as a Stampin' Up Demonstrator almost two years ago. In the fall of 2005, a group of 10 ladies started meeting at my house once a month. I would share some of my stamping and creating knowledge with them each month and we created some great projects. They would in turn, purchase some Stampin' Up stuff from me and look forward to the next month when they could do it all over again.

Unfortunately this year, more than half of the ladies had to drop the Group due to time constraints. I now have a group of four ladies who meet every couple of months to craft in my basement with me. I come up with projects and teach them how to do them.

We are meeting this afternoon to make these wonderful boxes. I showed them the one I had made at our last craft afternoon and they all thought that they were wonderful.

Depending on who's directions you follow, they are called either
Fantasy Boxes or Friendship Boxes.

They take a bit of time to do but really aren't difficult. They'd be a great way to give some little gifts... earrings, candles, diamonds LOL!

Be sure to scroll down... I've posted twice today!

*Bake Auction*

Each year, the Beaver/Cub/Scout Group our kids are involved in host a Bake Auction just before Christmas. Each family must provide two items per child enrolled in the program... usually baked items, but not always. Things like a dozen cookies, or a plate of brownies. While the kids have their meeting, we parents get silly and pay lots of money for these items. All of the money collected is then donated to charity. Last year we gave it to the Alberta Childrens Hospital to buy toys for the kids at Christmas. This year, it all went to the food bank. I am sure that there was a fair amount of money raised since we were one of about 30 families involved and we spent just about $100!!

I did come home with something really cool, made by my friend Linda. She is a very crafty gal... cake decorating, scrapbooking and who knows what else!

I am so thrilled that I was the winner for this auction (in fact, there were three of these beauties to be auctioned off... each brought in $25). I have made the Candy Cane Reindeer before for the kids to give out to their friends, but I never would have thought to do this with them! She has created all of Santa's Reindeer (the one on the front is Rudolph with his red nose). She covered a piece of styrofoam with batting to create snow and has inserted each of the Reindeer into the foam. She has tied a thin black cord around all of the Reindeer and attached a small bell on the reins around each of their necks. She painted a wooden sleigh from Michaels and attached that to the styrofoam as well. She added a beautiful Christmas ribbon around the sides of the styrofoam and a red cello bag full of gingerbread goodies and chocolates tied with a Christmas ribbon.

What a great addition to my collection of Christmas Decorations!

Thursday, November 30, 2006

*Holiday Card Contest*

Each year I host a Holiday Card Contest on the YahooGroups Email List I own/moderate. The group is called CST and it's for Canadian Stampers and Paper Crafters.

While only our members can enter and vote, I invite you all to check out the cards in the five categories in the contest. You'll find them on my Picturetrail Site.

Voting for only two cards will be difficult for the members of CST!

Tuesday, November 28, 2006

*Snowflakes.... Brrrrrr*

OK, it wasn't snowing today, but it is still bitterly cold!! We broke a 110 year old record for a temperature low last night. Yup, it's that cold. There is a light at the end of the tunnel... still be low normal, but better than what it's been!

The cold weather makes me think of snowflakes. It also helps that there's quite a bit of snow on the ground!

This card looks so much better in person. The scan didn't do it any justice so I took a digital photo instead. And even then, it's not as good here as it is in my hand. I started with a Buckaroo Blue card cut to 4.25"X8.5". I took the snowflake image (Stampers Choice) and stamped it int he centre of the card in silver ink and embossed it in silver. I then stamped Seasons Greetings (Hero Arts) across it in Buckaroo Blue classic ink. I added a silver edge all around the card with a silver paint pen and three clear jewels to the bottom right corner. A piece of Vintage Violet stitched ribbon across the top finished it off.

Thanks for looking!

Monday, November 27, 2006

*I'm Still Here*

I'm freezing, but I'm still here! At lunchtime today, with the windchill, it was -41C (that's -42F)! It is NASTY out there!

I've had to go out in it a few times today to go to work and to go to a meeting. Brrr, is all I can say. We're skipping Tae Kwon Do tonight... just too cold!

I have been doing a bit of crafting during this cold snap, however it's nothing new. I'm working on Christmas cards and have decided to do a dozen each of 5 or 6 of the designs I've already posted on my blog.

I will try to get something new out for you in the next day or two... although my week is pretty busy. But I will try! Don't wanna disappoint my visitors!

In the mean time, grab yourself something warm to drink, a cozy blanket and stay warm!!

Saturday, November 25, 2006

*Happy Holidays CASE*

I haven't had a lot of time to get crafty and when I have been crafting, I've been trying to work on my Christmas cards. I've decided to do a few different designs this year (which is new for me). So far I have a dozen each of two different designs... ones you've already seen on my blog (the white with the three snowflakes and ribbon and the snowman on the Certainly Celery cardstock).

In surfing yesterday, I found a beautiful and simple card on Natasha's Blog . I don't have the stamp set she used, but I knew I had others that would work. Being short on crafty time (had Bruce's office Christmas Party last night), I thought I would use her card, make a few changes, and post it on my blog. I feel bad when I don't have new things to share with you all more often!

This is pretty much a straight case of Copy And Share Everything. I loved everything about her card so I decided to make it for myself! I used True Thyme and Cranberry Crisp. I added some of the Sakura Stardust Gel pen in clear on the little tree in the circle and in silver around each of teh three stamped images to add some bling.

This card also gave me a chance to play with the Uhu Glue Samples I received earlier this week. I received the Twist 'n' Glue and the Scrapbookers Pen.

These are both clear liquid glues that work very well. The applicators are nice. With the Twist 'n' Glue, you can either have it twisted all the way down so only the green nozzle is at the end of the applicator and it will leave a dot of glue. Or you can twist it up and have the applicator nozzle embedded in a plastic piece that will spread out the glue. I used just the green small tip to add some bling to another card and it held well.

The Scrapbookers Pen has a great applicator nozzle that allows you to spread out the glue as you go along. Both dry quite quickly which is good in some cases... but sometimes you need to have the glue dry a little more slowly so you can play with the placement. I'm not a big glue person (mostly use double sided adhesive) but I found this stuff to be very user friendly. I'll definitely be pulling it out more often than other glues.

Thursday, November 23, 2006

*Free Stuff is Good!*

There are a few different offers out there for some free stuff for your cardmaking/paper crafting.

I found an offer for free Uhu Glue samples on It's All About the Journey. I believe you have to have to craft related blog for them to send you the glue. She has a great review of the free glue she received as well as information as to how to get your own glue. My glue came this afternoon but it sat in my mailbox where it is -13C today so it's a little too cold to use at the moment. Once it's warmed up and I have some time, I'll play with it and let you know how it works!

I also came across another blog (Ask Me To Stamp) that has information about a way to get some free cardstock Follow the links there to Prism Paper and see if you can't get yourself a free sample of their product.

EDIT: Thanks to Sheila in Seattle who tells me the Prism Paper give away is over.... sorry about that gals!

Wednesday, November 22, 2006

*Christmas Card Workshop*

I had a group of girls over last night to work on Christmas Cards. I offered up my stamps and they brought their own papers and some of their own inks and off we went making cards. One of the ladies brought her Loads of Love set and asked if I could do a card using the set for her. I asked if I could scan it before she left.

This was my first time using this set and I think it turned out pretty well. It was hard for me since this isn't a set I think I would usually use on my own.

I started out by stamping the truck on Shimmer cardstock with black ink. I then used my Stamp-a-ma-Jig (stamp positioner) to place the tree in the back of the truck. I also had to use a Post-It Note to mask off the truck. I stamped the tree in True Thyme. I then coloured the truck in with markers using Ruby Red and Going Grey and I used both the Silver and Clear Sakura Stardust Gel pens on the truck. I sponged Ruby Red ink along the edges of the Shimmer cardstock. I then layered it on to True Thyme cardstock and popped some gold brads into the corners. I cut a Cranberry Crisp card, layered on a piece of the Holiday Thyme patterned paper (which I coloured the stars with the clear Stardust pen). I put the truck image onto the card. Still, it needed something. You can't see it in the scan very well but there are black doodle lines around the bottom edges of the Cranberry Crisp card and little black dots on the True Thyme frame.

It took me quite a while to complete this card. I stamped and then stared at it for a bit. Then coloured and stared at it for a bit. Then added the sponging around the edges and then stared at it for a bit.... you get the idea.

But, I am pleased with the end result. The journey to the end result was part of the fun!

Tuesday, November 21, 2006

*We Have A Winner!!*

I had my sick son pick a number for me this morning to choose a winner for the contst for the 5000th page view of my blog.... he chose #17.... which means TRINA is a winner! Trina, please email me at nancy dot elrick at gmail dot com with your address and I will pop a package off to you asap.

I can't believe how many page hits I received in a 48 hour period. I posted in two communities my excitement about my first tin (both CST (a YahooGroup for Canadian Stampers which I happen to be the list owner of) and Splitcoast Stampers) and in two days I had 840 page views! WOW-o-WOW!

I hope to get something new and creative up here later today for you to see.... I took yesterday off from creativity (and work) as it was a sad day for me.... my Dad passed away in May and yesterday would have been his 74th birthday. I shed some tears and enjoyed lots of memories of my Dad. I sure miss him....

Sunday, November 19, 2006

*Sunday Craft Day*

We've had a quiet "around the house" kind of day today... if you don't include the fact that my husband was in line at Future Shop at 6:30 this morning to get a new Nintendo Wii for the kids. The kids have been saving some money they got back in February for this new system which was released today. We missed the pre-order period and decided we would *try* to get a system this morning. Bruce was #44 in line... and at about 9:30 this morning he found out that the store had 48 systems to sell. We were this close to not getting one. We made sure the kids had all their homework done before today so that they could spend the day playing video games. It seems like a pretty neat system with a "revolutionary" idea for the controller. Should be fun!

So, while the kids played (and Bruce put the Christmas lights up outside), I decided to do some craftin'.

Believe me when I say this card is so much better in real life... I used that clear Sakura Stardust gel pen on each of teh stars in the patterned paper as well as to colour the bell at the end of the word "jingle". Sure makes it sparkle! There is also a gem for bling in the centre of the middle ornament. All images and supplies (except the Gel Pen) are by Stampin' Up. I use foam tape behind the tag to pop it up just a little bit.

I think I'll need to order more of these stitched ribbons and the Holiday Time paper before the end of November... I just love them!

Don't forget to enter a comment in the post two below to enter my 5000th Page View Contest!

Saturday, November 18, 2006

*My First Card Tin*

I've had a Provo Craft lunch tin for several months now but it's been sitting in my craft space waiting for me to do something with it. I think I've been pretty intimidated about trying to cover it. There are no directions or templates out there for them. But I decided yesterday that it was time to play with it. I pulled out some Stampin' Up Patterned Paper from the Simply Scrappin' Friends and Flowers Level 1 Hostess Set and went to it. Covering the main part of the tin was easy. I did the striped paper first... a layer of Modge Podge on the tin and then put the paper down on it. I waited for it to dry before putting the flower paper on. I used a circle punch to cut out the area around the latch. I put the Modge Podge on the back of the paper this time and carefully wrapped it around the tin. When it was all dry, I added two layers of Modge Podge over the top of the decorated papers.

The lid was a little more difficult. I started out with a piece of computer paper and cut it to the approximate size and played with my corner rounder punch and measurements until I got something that would fit pretty well. I cut slits in each side of the paper up to the holes for the handle to be able to get the paper on in one piece. I put the Modge Podge on the back of the paper and on the tin (thin layer on each) to allow for some extra time to be able to move things around to get it perfect. Once it was dry I added 2 coats of Modge Podge on top of the patterned paper.


I added a light yellow grosgrain ribbon around the edge of the lid and the Cranberry Crisp stitched ribbon around the tin to cover where the two papers overlap. I put sticky strip (also known as red line tape) along the ribbon and then stuck it on the tin. I also added some Prima Flowers to the top and added some bling to the centre of each flower. There are also three little blings in the bottom right corner of the front of the tin.


I then created 4 dividers out of Cool Caribbean cardstock for inside the tin, using the circle punch to create the tabs on the dividers. I wrote on each tab with a black marker and added some sparkle with the clear Stardust Gel Pen. I filled the tin with cards to create a gift for one of the kids' teachers this year.

It really wasn't as daunting a project as I feared it would be. I now want to go to the scrapbooking store and buy more of these wonderful tins!

Don't forget to enter a comment in the post below to enter my 5000th Page View Contest!

Friday, November 17, 2006

*5000 Page Views!!!*

WOW o WOW! I can't believe I've made it to 5000+ page views on my little Creative Mess! I'm very excited about that.

I made this card yesterday for someone special and decided that it would be a perfect card to thank everyone who visits my blog. I received a tin of huge Prima Flowers from my girlfriend and finally decided to make something with them. The Creamy Caramel card is 4.25X4.25" I stamped it in Creamy Caramel with Print Background. I lined each of the diamonds with the clear Sakura Stardust Gel Pen (you can't see the sparkle in the scan) and added a black dot between each diamond. Thank you is stamped in Bravo Burgundy on Creamy Caramel and layered onto Bravo Burgundy cardstock. I coloured the edges of the Bravo Burgundy piece with the Stardust pen and added a gem for some bling. I put the large flower together with a gold brad and adhered it to the card with a glue dot.

To celebrate my 5000 page views, I'm offering a contest! Yup, yet another blog contest! If you leave me a comment on this post between now and Tuesday morning (November 21st) your name will be entered to win a pack of fun stuff from me!

Thanks again for taking a look at my little Creative Mess!

Thursday, November 16, 2006

*Winter Mini Sneak Peek!*


I received my Winter Mini preorder while I was out of town and as soon as I had a few minutes I got to work playing with the new Small Tag Punch and Taggers Dozen. I also used Little Pieces and On The Spot.

The colours used are Rose Red, Certainly Celery, Basic Black and Whisper White.

You can't see it in this scan, but the white piece is embossed with Iridescent Ice to make it sparkle.

I didn't have enough of the Celery Grosgrain Ribbon so I used a strip of cardstock instead.

The tag is actually a flap that opens and I have the word "friend" written in there with a white gel pen.

Be watching tomorrow for a special surprise to celebrate my 5000th page view!

Wednesday, November 15, 2006

*Snowflake Simplicity*

This is another card I made while Mom was here. She left yesterday, sniff.

I used Bashful Blue, Whisper White and Basic Black on this card. I stamped the Holiday Print background in White Craft Ink on the card (which is cut to 11X4.25"). The snowflake is a Stampin' Up! punch. I layered the Bashful Blue snowflake onto Whisper White and then coloured in the snowflake area with the clear Stardust gel pen. I added a few more layers and then put it onto the black, which I also coloured with the Stardust gel pen. I added some bling in the centre of the snowflake and three beside it and voila!

This is the last of the cards I made while Mom was here... gotta find some more time to stamp!

Thanks for looking!

Tuesday, November 14, 2006

*Snowmen Have Heart*

I love snowmen. Have I said that before? This was one of my must have snowmen a few years back and would you believe that this is the first card I've ever made with him? Sad, eh?

I stamped the image on Whisper White cardstock with black Staz On ink and used a wet brush (I don't like the water brushes) and my Stampin' Up Watercolour Wonder Crayons to colour it. The black frame directly around the snowman is part of the image... the black line that creates the frame I drew with a black marker and my ruler. I stamped some little snowflakes on the Bashful Blue cardstock with white Craft Ink, punched a piece of black cardstock with the Word Window Punch and attached it to the card as a tab with a brad. I layered all of this on to a black layer and then on to a Bashful Blue card.

I got inspiration for this card from a card I had printed off at least a year ago... but I have no information about who created it. If you know, please leave me a comment so I can give credit where credit is due!

EDIT: Anna is right!!! It was her card I copied shamelessly! I printed off a bunch of cards last year but didn't keep any of the information as to who created the cards. You can see Anna's card HERE and take a minute to check out her Blog too!

*My Friend Cam -- October 13, 1972 to November 9, 2006*

I just wanted to take a minute to remember my friend Cam who passed away after a long and hard and brave battle with Colon Cancer. I met Cam when I befriended her older sister the summer before Chris and I started kindergarten (1975). The lived just a short walk around the corner from my house. From early on I was a part of that family... calling their parents Mom and Dad, eating breakfast there on the way to school... even being part of the daily vitamin ritual.

Cam was a great "little sister" for a girl who had only big sisters at home. She grew into a wonderful woman. She became an English professor at the University of Regina and I understand she was well-liked and respected by her colleagues and her students. She married Corbett in 2001 and together they started a family. Liam and Caine are only 8 and 4 and my heart breaks that they do not get to spend more time with their Mom.

Knowing that her time was near, Cam prepared for her memorial service and her obituary, writing parts of both. You can view her obituary (if you wish) ... do a search for Cam McCabe.

The kids know that Mommy isn't coming home.... that Mommy now lives in their hearts. I think they are dealing with her passing better than I am.

Thank you for allowing me to indulge in my sorrow.... and remember to give the ones you love a hug that's a little longer today.

Monday, November 13, 2006

*I'm Home!*

And WOW am I tired! Vegas was a blast... lots of walking, enough drinking and eating, some great shopping, and a bit of gambling.

Getting to Vegas was half the battle... one couple in our group didn't get on the plane as they didn't have the right identification. They managed to get on a later flight (only arrived 3 hours behind us) but then they had no luggage. But that arrived before they went to bed on the first night. We were in lineups all day long.... made our flight out of Calgary with no time to spare after long lines at Customs and Security. Missed our connector flight in Phoenix but were on a flight only a few minutes later. We had a lot of fun and would definitely go back again.

I was smart before I left... and I made up a few cards to entertain my readers when I got home. My stats show a HUGE drop in readership.... I sure hope I can gain that back again! I guess that will teach me to go on vacation (I need a vacation from my vacation though....).

So.... here's a card I made before I left to give to my friend Denise who celebrated her 40th birthday with 18 of her friends in Vegas!!

Again, you can tell how much I love these scallop punches. My friend Cindy punched me a bunch of white and cream ovals and I have now ordered the punch for myself.

I am proud of this card because I made it with no inspiration from anything other than myself!

I stamped the scallop with Regal Rose ink after stamping it off once. The greeting is done in Almost Amethyst. I sponged the edge of the scallop with Regal Rose ink. I covered the entire scallop with Versamark ink and Iridescent Ice Embossing Powder and heated it. I added layers of Certainly Celery and Regal Rose, some Celery Ribbon and gems in the corners for the "bling factor". The Whisper White cardstock was cut to 11X4.25" and folded in half and the ribbon is wrapped inside the card. Celebrate was stamped in Regal Rose.

Thanks for looking!

Wednesday, November 08, 2006

*I Love Scallops*

Actually, I hate the fishy kind. And I wasn't sure what all the excitement was about with these punches, but let me tell ya... I love 'em!!! I bought the giga circle and square and have just ordered the giga oval too. Sigh...

I got the idea for this card from a layout idea at PageMaps. What a great site to give you a little push in your creativity! I used the Giga Scallop circle to take a bite out of the patterned paper. I attached the ribbon to the stamped little circle and wrapped it around the patterned paper. I then masked the scallop circle and stamped the large snowflake in white craft ink and embossed it in white. I added a little bling gem in the centre of the snowflake and as the dot on the "J" in joy. I think I should have masked off the Bashful Blue card so that the snowflake didn't go outside the circle, but that's OK.

Took Mom shopping yesterday to one of her favourite stores in Calgary. It's called Paper Pastimes. We both spent a good chunk of money there. I hope to find some time to play with what I bought! I picked up one of the teflon bone folders (they aren't supposed to leave that glossy look to your paper after you use it), some gel pens, a stamp that says JOY (that I want to ink with my markers one letter at a time and punch out and use), a bunch of Christmas Class-A-Peel stickers, some of the coloured little gems from A*Muse. Probably could have bought more.... but that was enough LOL!

This post will have to hold you over for a few days... I'm off, bright and early (well actually, dark and early) Thursday morning for a weekend in Vegas with 18 friends. We'rer heading down to celebrate the 40th birthday of one of my closest friends. I hope I survive LOL!

Thanks again for checking in.... come back next week for more!

Tuesday, November 07, 2006

*Scallop Punch*

I was asked where I got my Scallop Punches from. These are the giga sized ones (the largest) and I ordered them from http://www.franticstamper.com I've been doing business with Fran for many many years now. She has great prices and even better service! It's a US company but her shipping rates to Canada are reasonable. If you're looking for the Scallop Punches, go under Punches and then click on Marvy.
But beware... you can't get away without ordering more!

*Merry and Bright*

I bought the set called Quick Cards from the Holiday Mini (page 8) and was so excited waiting for it... and then it arrived and I realized that it was three large stamps instead of 6 smaller coordinating stamps. I was so disappointed. I have tried a few times to use this set with no luck at all.

Until yesterday....

That's when I came up with this card. I inked only the the ornament on the Christmas stamp with Cranberry Crisp and stamped it on a piece of Whisper White cardstock. I then centred it in my Giga Scalloped Circle Punch. I sponged Buckaroo Blue ink around the edges and added dots of white Liquid Pearls in each of the scallops. I set that aside to dry. I cut a piece of Cranberry Crisp to 4"X5 1/4" and stamped it with the On The Spot in Whisper What ink and heat set it to dry it. I wrapped a piece of True Thyme stitched ribbon around the Cranberry Crisp piece and attached it with double sided tape to my True Thyme Card. I put the scalloped circle on the front and voila!

I'm still not sold on this set, but at least I've found one use for it! I sure would have liked it more if it had been 6 stamps. I guess it pays to read the fine print in the catalogue!

Monday, November 06, 2006

*My Mom Is Here*

My Mom is the one who introduced me to stamping. It was in November of 1996 and I was pregnant and visiting for my Dad's Birthday. She wanted to show me this new craft she discovered and I thought "Oh God, not again". Mom has done almost every craft known to woman over the years. Anyway, she showed me thermal embossing... and I was hooked. My husband bought me a bunch of stamping stuff (powders and a heat tool) for Christmas and I've never looked back. My first project was my Christmas Gift tags that first year... my first big project was Matthew's birth announcements a few months later.

So, Mom is here for 9 days to visit. Part of the reason for her trip is to watch the boyz while Bruce and I go to Vegas for the weekend. We are heading off on Thursday, going with 18 other people to celebrate my good friends' 40th birthday. It should be a lot of fun.

With Mom here, I am sure there will be a lot more crafting going on. It's so wonderful that Mom has found her card making groove again. She took a little break from things when my Dad passed away. She doesn't do a lot of stamping, but she loves to make cards... all sorts of intricate and time consuming designs. You can see some of her stuff (nothing new) on her Picture Trail site.

Mom arrived on Sunday afternoon and we spent the afternoon watching a football game (and yes, the team we were cheering for won!). After dinner she and I went down to my crafting space. It took me a while to find some creativity. Same as the last time I went down... I spent 2 hours on two things that didn't work out. But last night, I was productive.

This card came to me while playing with the Giga Scalloped Circle punch. My larger SU circle punch fits in the centre just perfectly (would probably make a great flower if I wasn't so in to making Christmas cards right now!). The colours I used are True Thyme, Vintage Violet, Cranberry Crisp and Whisper White. I added little dots to the scallops with white Liquid Pearls. The brads were an afterthought as the card needed that unknown "something".

Thanks for looking.... watch for more in the coming days!

Friday, November 03, 2006

*Simple Snowflakes*

Don't you just hate it when you spend time working on a card and then, when it's finished, you're just not sure that you really like it as much as you wanted to? Well, that's the case with this card.

I started with a Vintage Violet card. I punched circles out of Bashful Blue. I then punched the snowflake punch out of Whisper White and then centred them in the circle punch. I used the 2-way glue pen around the edges of the circles and added some glitter. I glued the snowflakes onto the blue circles and added a silver brad in the centre of each. I used the Sakura Stardust pen (clear) to add sparkle to the snowflakes (coloured the blue through the punch) and then added a Vintage Violet stitched ribbon to the card.

Thanks for looking!

Thursday, November 02, 2006

*More Bling and More Snowflakes*

I sure hope you're not getting sick of snowflakes and winter cards yet, cuz I think I still have a few more in me to make!

This card is one I love. I started out playing with the Fiskars snowflake border punch. I took a Whisper White card and punched along the bottom and then added a piece of the Holiday Time paper behind it. I used a scalloped oval punch out that Cindy sent me... I have the circle and the square giga scallop punches but not the oval (guess I gotta order it now too!). I inked the edges of the oval with a stamping sponge and Bashful Blue ink. I then used the 2-Way glue pen around the edges and added some glitter. I stamped the snowflake in the centre (almost LOL) with Bashful Blue ink and added a clear gem for sparkle. I put the card together and still it needed something... so I added the clear gems to the centres of alternating snowflakes in the border. I love the simplicity of this card. Those that know me well would probably tell you that this is a "Nancy" card...

I've had a few milestones in blogging in the last couple of days.... I've had a record number of page views on Tuesday and Wednesday (239 and 238 respectively) , I had a record number of comments on a post yesterday (7), and I'm now over the 3000 visits mark! How exciting!

Keep those page visits and comments coming! And please feel free to share my blog with others you think might be interested!

And thank you for coming to visit.... knowing that there are people who are popping in to check on my blog inspires me to get creative more often. I haven't stamped this much in a few years! It feels great to get back at it again!

If you have some time, grab a cup of your favourite tea/coffee/hot chocolate and take a browse through the blogs listed on the left... some wonderful ideas to be seen!

Wednesday, November 01, 2006

*Mind Meld?*

I think that perhaps M Cooper (from Splitcoast Stampers) and I shared a brain this past weekend! I was playing and came up with this card using the Snow Flurries set in the Holiday Mini. This is the first time I've posted it anywhere.... on Tuesday, I saw this card by M Cooper on the SCS gallery. I think it just goes to show that two people can come up with a very similar idea without having seen the others' first.

The colours I used were from the In Color line... they are Cranberry Crisp and True Thyme. The star on the top and Peaceful Wishes are stamped with Gold Encore Metallic Ink and embossed ... the star with Iridescent Ice, the greeting with gold powder.

Thank Heaven for my Stamp-A-Ma-Jig which allowed me to get my snowflakes stamped where I wanted the first time!

Tuesday, October 31, 2006

*Happy Halloween!*

Just a quick shot of the cake I made for the staff at the boys' school (and the school where I work in the lunchroom). This is two bundt cakes, put together bottom to bottom. The stem is a ice cream cone covered with green icing. Unfortunately for me, the face on the Jack-o-Lantern drooped. But the staff loved it all the same (I think they just love cake).

*Sparkly Snow*

I am still stamping Christmas and winter cards. I think I will probably continue on for a while simply because I love it!

I saw the idea for "Donut Cards" on Splitcoast Stampers. The idea is to make a window in the front of your card with the image attached to the inside of the card, showing through the window in the closed card. For this card I stamped the S N W on a Whisper White card in Buckaroo Blue ink. I then punched a hole through the front of the card to create the O. I stamped the round stamp from Riveting on Whisper White in Cranberry Crisp and again in True Thyme. I punched out the tree in the True Thyme and layered it on the red with a pop dot and then attached the circle on the inside of the card so it shows through the hole when the card is closed. I added some of the Holiday Time paper and some Cranberry Crisp stitched ribbon. The card was done, but needed something so I used the 2-way glue pen on each of the letters and covered them with glitter.

In case you didn't notice, I've added a "subscribe" option to my blog. You can enter in your email address and you'll be emailed when I update my blog.

Monday, October 30, 2006

*It Snowed*

Yup, it snowed here in Calgary. It's early in the season, but it happens. It shouldn't last too long, but it's there and it will probably be there for Trick or Treating tomorrow night. It's chilly out there! The snow came down after midnight on Saturday night so we woke up with a white blanket on Sunday.

So, I guess it's only fitting that I post a card with snowflakes this morning. It truly has nothing to do with the fact that I love snowflakes!


I got this idea from a card I saw in the Splitcoast Gallery created by Kim H. I loved the shape of the wave of patterned paper. This was my first time using the new Cutter Tool from Stampin' Up! It's going to take a little practice to be able to do it and not feel like a beginner.

The colours used are Whisper White and Buckaroo Blue. Everything on the card but the silver snowflake brad is from Stampin' Up!

Friday, October 27, 2006

*I Like Sparkly Things*

Bruce always gets a laugh because I am totally drawn to things that sparkle. Usually, they are expensive things like the diamonds in the window of the jewelry store at the mall! I like bling of all types!

I decided to do a little "bling-ing" on a snowman card today.

The colour combination of Almost Amethyst and Bashful Blue with Whisper White came from Dawn's Blog. I added a little Vintage Violet by punching two 1.25" circles and folding them in half. I stamped the snowman image from Frost on Whisper White and coloured him in with Bashful Blue and Almost Amethyst markers. I added some Pumpkin Pie for his carrot nose and some Rose Red and Almost Artichoke for the holly. The hat is coloured in Close to Cocoa.

To add the Bling-Bling I covered the entire Whisper White piece (after I'd stamped and coloured it) with VersaMark ink, covered it with Iridescent Ice embossing powder and heated it. I then stamped the Print Pattern Background with white craft ink onto the Almost Amethyst card and embossed it with the Iridescent Ice embossing powder as well. I added the silver brads to the Vintage Violet circles for just a little more Bling Bling and to break up the half circles a bit.

I absolutely loved this colour combination when I saw it on Dawn's Blog this morning... it just looked so cold and wintery... perfect for snowmen and snowflakes!

Again, thanks for looking!

**EDIT: gotta tell ya... this card looks better in real life than in a scan.... wonder if a photo would have been better.... there is no big gap of sparkle in real life... sigh....

Thursday, October 26, 2006

*Christmas... Less Than 2 Months Away*

I know... scary thought! Two months from now Christmas is over... we're eating turkey leftovers, trying to put new toys together, filling the recycling bin full of gift wrap, turning off the Christmas music... planning our New Years Celebrations. The weather the last few days has felt like fall, but not chilly at all... but I understand that's about to change. Of course... just in time for Halloween. Sigh.

Anyway... I finally found a little bit of time to be creative today. The key words being "a little bit". I just feel like I've been running around all week. Tomorrow should be a quiet day as the kids have a day off.

I saw a card like this on Julie's Blog back in September and started it soon after. I got the card itself done include the folds for the ladder, but then I left it and didn't do anything more with it. Until this afternoon. I don't know why it took me so long to figure out what I wanted to do with it.

The colours used (inks and papers) are True Thyme, Cranberry Crisp, Marigold Morning and Very Vanilla. I also used a piece of the Holiday Patterned Paper from the Holiday Mini. LOVE that paper!! I'm looking at the card and think it still needs something... just not sure what.

I can't seem to stop creating Christmas Cards. I just love stamping for Christmas! I don't know what it is exactly... the colours, the images... I still haven't found the card for our cards this year. I will keep trying until one makes my heart sing I suppose. It will be so hard to get back into non-Christmas stamping again... it is every year.

Again, thanks for having a peek! Please leave a comment... it's nice to read what others have to say and to know that others have been here and care enough to share a comment with me!

Wednesday, October 25, 2006

*Cool Little Snowman*

This is my Christmas Card from 2005. I wanted to show you another way to use the card layout that I posted last with the snowflake on it.

The card is Bashful Blue and has two score lines in it.... a scored about 1" from the bottom and then the remainder of the card in half. I used snowflakes and swirls on Whisper White in Bashful Blue ink layered on top of that. The small panel on the bottom is layered on white and Bashful Blue and stamped with Bashful Blue ink. The snowman image was from the Tag Punch Box Kit that Stampin' Up! sold last year. I stamped it in Bashful Blue on white cardstock and punched it out with the tag punch. I then used the Perfect Layers tool to create a layer around the white with Bashful Blue. The image was coloured with markers. I added some iridescent ribbon around the card behind the image.

The only thing I didn't like about this card was that there was no way to stand it up.

This fold was inspired by a birth announcement I received from a stamping friend of mine. I fell in love with it and knew I had to use it for my cards last year.

My apologies for not getting anything new up here yet this week... it's been crazy busy!

Saturday, October 21, 2006

*Saturday Snowflakes*

I have a total "thing" for snowflakes and snowmen. I have so many snowflake and snowmen images. But you know... I wonder if I am tiring of them, or simply tiring of the ones I own.

At any rate, here's yet another card with snowflakes.

The cardstock was cut for a workshop from a few months ago and I needed to figure out a way to use it. It was already scored to do two folds... wasn't like it was just a half sheet of cardstock. The original card was oriented with the small fold (on this card, the patterned snowflake paper) on the bottom but I wanted to see what else I could do with it. The Bashful Blue card is stamped with snowflakes in white craft ink. I sponged the Whisper White square with Bashful Blue ink and then stamped the snowflake in Bashful Blue. I added some silver cord behind the image and a gem in the centre of the snowflake (I love bling). The card opens from the side... the patterned piece is a panel that opens to the right.

I hope to stamp some more this weekend... but you know how it goes... a husband, 2 kids and a dog can sometimes make your crafty life non-existent. I think I got all of the "I have to" stuff done today... so tomorrow can be a play day!

A big Thank You to everyone who has taken the time to post a comment! It makes my heart happy to know that others are looking at my thoughts and creations and are interested enough to comment!

Friday, October 20, 2006

*An Inky Friday Night*

What a chilly day we had today... I'm surprised it didn't snow. We had some rain and some sleet-like stuff. I guess the worst part of it all was the wind. Brrrrrrrr. It was a good night to shut myself in the basement and be creative. I used some ideas from others' blogs tonight to turn out my own creations.

First we have a Joy Fold card, inspired by a post on Cindy's Blog.

I really like how this card opens. I used all Stampin' Up stuff on this card... Whisper White, Bashful Blue and Vintage Violet cardstocks, the new stitched Vintage Violet ribbon, some Hodgepodge Hardware. Inside the card says "Holiday Sparkle". The Holiday comes from the Happy Everything set and Sparkle is from Warm Words.

Next we have a
Peek-A-Boo Card, inspired by a post on Dawn's Blog.

I used that non-traditional colour combination of Certainly Celery, Regal Rose and Cool Caribbean again. I don't know what it is about this combination this year. Bruce doesn't like it much though so I can guarantee that our Christmas Cards won't be done in these colours LOL. I love how this card has "motion" to it. The white window with the snowflake on in when the card is closed changes into the green window with a greeting stamped in it when the card is opened. You can't see it well in my photo, but there are white snowflakes all over the front of the card. I will have to play with this card technique some more for sure!

Monday, October 16, 2006

*Kelly Came to Stamp!*

My friend Kelly and I used to stamp together several times a week... then she went and got a job on me... she works Tuesday to Friday until 3pm, which leaves us little to no time to stamp. We always talk about getting together to play on Mondays, but something seems to come up for one of us. We made plans two weeks ago to play today when I got home from work (I work in the lunchroom at my kids' school from 11-1 every day). We would have done it last Monday however it was Thanksgiving and silly-Kelly planned her big dinner for Monday night!

So I got out of bed this morning with a really really awful headache. Through the morning it became a mild migraine. I still went to work cuz I'm a trooper (or an idiot) and made it through work. Funny, the noise didn't make it worse, but light and movement sure did! It's like someone is poking a sharp stick through my left eye, through my brain and into the back of my head... and then tapping on it every once in a while to remind me that it's there. At work I had a few episodes where my ears started to ring. Not a happy camper.

Kelly came over when I got home from work and was going to leave when I told her about my headache... but we haven't played together in so long that I asked her to please stay. I wasn't sure that I would be at all creative but I wanted to spend time with her. We managed to craft for a couple of hours but she felt bad and decided to go home to let me rest.

I did manage to pull off two more winter cards, each inspired by card layouts found at PageMaps. They have some great ideas there (be sure to check out the archives as well!)

This card didn't turn out exactly as I had envisioned it. You can't see all the glitter and Bashful Blue doodling which definitely helped the card pop out a bit more. The card is white with Bashful Blue squares that are lined with the iridescent glitter. The snowman is stamped with black ink and coloured with Rose Red and Old Olive markers. The buttons on the snowman are jewels. The edges of the tag are sponged with Bashful Blue ink and I then ran my 2-way glue pen around the edges and added glitter. There is doodling around the edges of the card to crate some interest. Too bad you can't see it on the scan.

Apparently I had a thing for squares today. I really like the tag corner punch and I like using it in different ways... like just the opposite corners on this card. The colours I used were Buckaroo blue and Cranberry Crisp. The centres of the snowflakes are again jewels.

I am now going to go and rest for a bit. The kids and I have Tae Kwon Do tonight and I'd rather not miss it as I will have to miss on Wednesday.

Thanks for taking a peek!

Friday, October 13, 2006

*Shake It, Baby!*

I went down to craft again this afternoon... sat there for almost an hour and didn't accomplish anything! I had an idea I wanted to try but it didn't work so it ended up in the garbage. Am I the only who has a tough time using the new Cool Caribbean cardstock from Stampin' Up? I am just not a fan of that colour at all. Too close to a peacock colour for me.

I decided that I wanted to play some more with the non-traditional Christmas colour combination I played with the other day and then figured I'd try my hand at a shaker card. It's been years since I've tried to make a shaker card. I couldn't find my double sided foam tape so I had to use a bunch of foam squares, but it worked.

The scan isn't great.... but the card looks good LOL. The colours are Cool Caribbean, Regal Rose and Certainly Celery. You can't really see it on the scan, but there is a blue snowflake in the window with clear and blue mini beads. The backgound on the Certainly Celery is not only stamped with the Print Background in Certainly Celery, but there are white snowflakes all over the background as well.

Thursday, October 12, 2006

*More Christmas*

I'm sorry it's been so long since the last time I posted... I went down to stamp yesterday afternoon and I sat there and did absolutely *nothing* in an hour!! How sad is that? I just couldn't decide on colours or on a layout or even on a stamp I wanted to use!

Have I told you lately that I *love* stamping for Christmas?? I just love making Christmas cards and tags. It is truly my most favourite "occasion" for card making. I love the colours and the images.

I didn't go down to stamp today specifically to make Christmas cards, but I ended up making three of them. I love one, like one, not so sure about one.

First, the one I'm not so sure about....
I wanted to do something a little different with colour... and different it is. It does look a bit better in real life as you can't see the doodles around the red and green layers in a glitter gel pen and a white gel pen respectively. I also added the glittler pen on the snowflakes. All stamps are SU. The On The Spot background is also stamped in white on the blue, which you can't see. The sentiment is stamped and embossed in gold. The colours I used are Bashful Blue, Real Red and Certainly Celery. As much as this snowflake punch was a "must have" for me, I sure haven't used it much.

This next one is one I kind of like...
The colours on this are all from the In Color Collection from Stampin' Up! The Season's Greetings is by Uptown Rubber Stamps. The snowflakes on the Cranberry Crisp panel are stamped in silver Encore ink. The other colours are Marigold Morning, True Thyme and Buckaroo Blue. I splattered a little Marigold Morning ink on the white piece with the Seasons Greetings stamped on it. Just not sure about this one... doesn't go into my favourites folder, that's for sure!

And finally, the one I liked... which happens to have been the first one I made today.
It really does look better in real life... the Real Red panel is stamped with snowflakes in both Real Red and Whisper White ink. The strip beside the Real Red panel is Old Olive covered with the red line (Terrifically Tacky Tape or Sticky Strip) and iridescent glitter. Happy is stamped in Old Olive ink on Old Olive cardstock and the Holidays is stamped and embossed in gold. I edged the Old Olive panel with the 2-Way Glue Pen and covered it with iridescent glitter. The other green in the card is Certainly Celery. The snowflake in the corner is a gold brad I bought years ago.

I was thrilled to log in today and see my counter approaching the 1000 viewer mark! How very very exciting! I guess I'd better post on a more regular basis if I want people to keep popping back in!

If you have some time, take yourself on a tour of some of my favourite Blogs, found to the left of my Blog... there are some wonderful ideas there.... lots of things to help inspire you!

Saturday, October 07, 2006

*National Card Making Day*

Today (October 7th) is National Card Making Day. I had high hopes of spending most of the afternoon creating but ended up running some errands and putzing around the house instead. So I went down after dinner and was able to come up with three cards.

I thought of this card while I was trying to fall asleep last night. Well, not the whole card, but the idea of the frog in the Santa hat. The frog is from the SU set Unfrogettable and the hat is a brad I bought a few years ago. I added some googlie eyes to the little guy and used some of the SU Holiday Thyme paper as an accent. You can't see it so well in the scan but the white piece is outlined in gold marker and "be merry" is stamped in gold ink to the right of it. I love the froggie with the hat but am not thrilled with the card itself... back to the drawing board on this one! The cardstock is True Thyme.

I created this card for a swap I am participating in on CST... it's a "Rudolph Swap". I used a favourite layout (find out more here). I just love this layout. The stamps used are not SU (other than the Print Background). The colours (in case you're curious) are Old Olive, Real Red, Certainly Celery and Very Vanilla. The reindeer is stamped in gold and the Seasons Greetings is in Old Olive. I'm really pleased with how this card turned out.

I created this card using inspiration from two of Taylors ideas on her blog.... the layout and the colour combination. I did this card as an entry for a challenge to use non-traditional colours for a Christmas card. I'm surprised at how much I like it! The colours are Cool Caribbean, Regal Rose, Certainly Celery and Whisper White. The centres of the one ornament on each tag is a little gem I bought today... I bought the word "wonderful" in these gems at Michaels (they were on sale!) and I am cutting them apart to use them as accents on cards. The stamp sets are Totally Terrific Tags, Snow Flurries and On The Spot, all by SU.

I hope that you found some time today to celebrate National Card Making Day in your own way.

Tuesday, October 03, 2006

*My Calendar Page*

I've been bugged and bugged to show the calendar page I did for a Calendar Swap I am participating in on CST. I decided today as I was packing them up to mail them off, that I would finally share what I did. I was given the month of December to do and didn't want to do anything Christmas-related since there are people in my group who do not celebrate Christmas. I also knew I wanted something clean and simple. My friend Jacquie who is hosting this swap will create the calendar grid pages and add them in before she gets each catalogue bound and mailed back to the participants. What a lot of work!

I used a card I CASED in September (by Debbie Olson) as imspiration for this page. Lots of things you can't see on this page in a scan that you'd see in real life... first, the paper is the Stampin' Up! Shimmer Paper... I love this stuff! Second, there are snowflakes embossed in Iridescent Ice embossing powder all over the background of the paper. Third, you might be able to tell that the five coloured snowflakes are on dry embossed squares. I'm totally not happy with the scan... sure makes the calendar page look boring.

A very simple page, but I was thrilled with the simplicity of the creation. The colours I used are Buckaroo Blue and Cranberry Crisp, two of the new Stampin' Up! In Color line.

And I am totally in love with the stitched ribbon in the Holiday Mini. I gotta buy more of that before it's no longer available!

If only I could come up with the Christmas Card idea for my cards this year....

Monday, October 02, 2006

*Assembly Line Creativity*

Sometimes, assembly line stamping can be a wonderful thing. I finished the birth announcements for baby Liam today. I did 4 dozen of them for Chuck and Mo to send out. When doing multiples of the same card (which can be boring, but also effective) I prefer to do all of one step before moving on to the next. I seem to think it saves time. It just makes more sense to me.

So, these birth announcements.... I got the inspiration for this card from a card we made at a stamping gathering here in Calgary this past summer (thanks to Susan B for organizing).

The pull tab was printed on the computer. I took the word window punch and put a piece of folded cardstock into the punch so that the fold was just over the half-way mark of the punch to create a stopper for the pull tab so that it won't pull out of the patterned paper. The circle image was punched using different sizes of circle punches... the inside circle was covered with 2-way glue and ultra fine glitter. The inside of the card holds all of the information about Liam's birth.

Mona really wanted green cards... the baby's room is painted in a bright green colour. I just couldn't find any good patterned/scrapbook paper to go with that colour of cardstock, so I did Always Artichoke and So Saffron instead.

These will be in the mail in the morning... I sure hope she loves them!

Sunday, October 01, 2006

*Congratulations Chuck and Mo!!*

I was thrilled to get a phone call last night from Chuck to let me know that baby Liam has arrived safe and sound. Chuck is engaged to Mona, one of my oldest and dearest friends. I've known Mo since she came to my school in grade 1, back in 1976. She now lives on Vancouver Island where she and Chuck have built a house. Baby Liam arrived via C-Section at 1:02am on September 30th weighing a whopping 9 pounds 2 ounces. Mona is only 4'11" so this is one BIG baby!

I was busy this afternoon working on their birth announcements. I am doing them assembly line style and I'd say I'm more than half way done. I hope to get them finished off tomorrow before I have to start cutting my materials for my stamp club on Tuesday afternoon and a party on Tuesday evening.

I am so happy for Mona and Chuck..... baby #1 is such an exciting time!